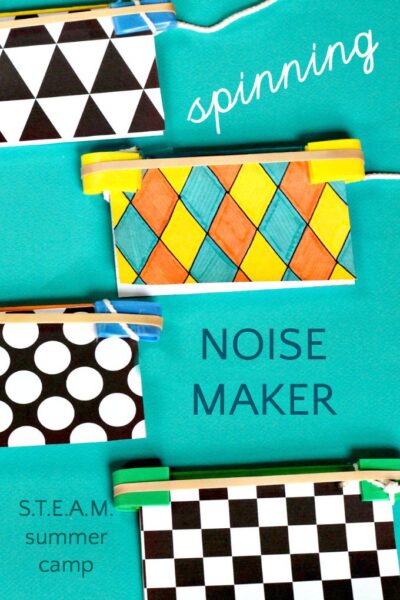
Today we are exploring the science of SOUND with a DIY noise maker.
Since I knew my boys would take delight in making a toy that they could use to annoy one another, a buzzing, spinning noise maker seemed like the perfect science project. But don't let my kids' sibling rivalry deter you! These spinning noise makers are actually easy to make and will teach kids about how vibrations produce different sounds.

Making these buzzers is a fairly simple process. I enjoyed decorating them, but at the time my boys reacted with a bit of a grumpy 'tude when I suggested jazzing them up with their artistic skills, so as an alternative, we chose some printable patterns. I, however, quite enjoyed a bit of quiet time with the markers.
Just a side note: It turns out the kids didn't use the toy to annoy each other. Instead they tried to see how long they could keep the noise makers spinning, two at a time.
(Note: this post contains affiliate links. Purchases made through these links may earn commission.)
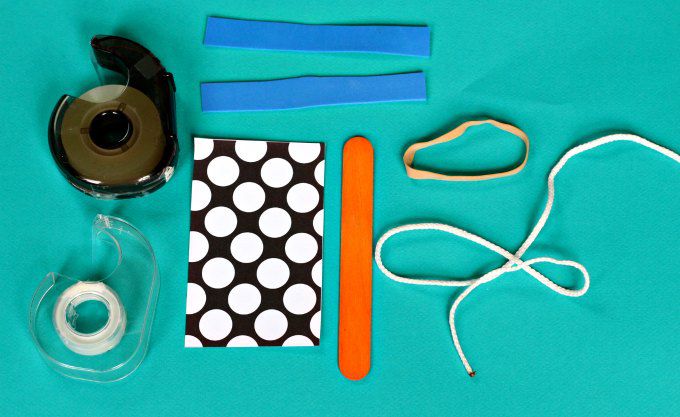
What you need:
- Jumbo craft sticks. We used fun colors, but plain ones like these will save you a few bucks.
- You need wide bands. We used #64 rubber bands. Did you know rubber bands have numbers? Yeah, me neither. The things we learn.
- Foam. I cut up leftover foam sheets like these. I'm a big fan of not buying too many products like these that stay in the environment for-evah. Put the challenge to your kids to find something around the house to try and use if you don't already have foam craft sheet. Do you have a suggestion for something that might work? Leave a note in the comments below.
- Tape
- Scissors
- String
- Index cards (or card stock cut to size)
- Optional: markers or crayons to decorate index cards.
- Optional: print out these black and white designs on card stock and cut to size

How to make a spinning noise maker
Watch the video to see how to make the spinning noise maker and hear what it sounds like, or read further on for the written instructions.
Instructions:
1. Decorate index cards, if desired (or use the printable).
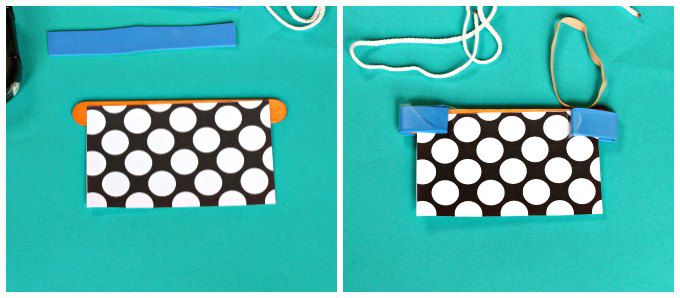
2. Tape an index card to each side of the craft stick.
3. Cut 2 strips of craft foam the width of your craft stick and about 4 inches long. Double it and tape to ends of craft stick.

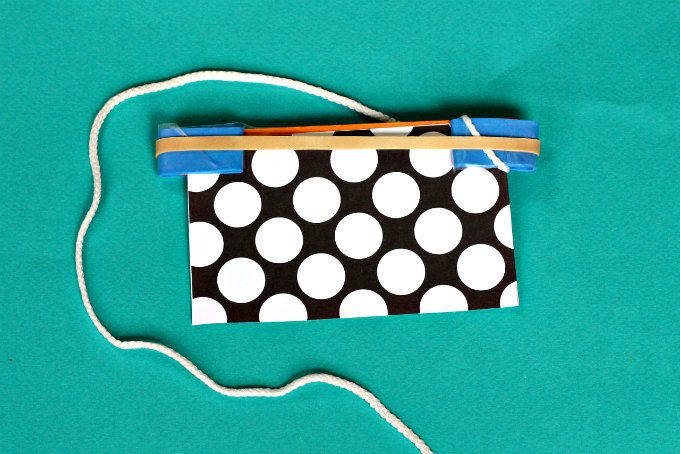
4. Tie a piece of string to the stick. The length of string should be about ¾ the length of your child's arm.
5. Stretch the rubber band along the length of the stick, over the craft foam.

6. Grasp the string and spin!
Extensions:
- Experiment with the length of the string. If the string is shorter or longer does the sound change?
- Does the sound change if you use a thicker piece of foam?
- What about if you use a different size or shape index card?
- What about if you use only one index card?
- What happens when you try and spin the noise maker backwards?
- Does the noise maker work if you twirl it above your head? What about off to the side? What if you try and twirl it downward?
- How does the sound change when you spin it fast or slow?
- What happens when you use a different size rubber band?
What's happening?
The noise is made when the rubber band vibrates against the wooden craft stick. These vibrations create waves in the air that we perceive as sound. This is also what happens when bees and flies fly. The movement of their tiny wings move the air and make a buzzing noise.
Want more spinning fun? Make an old-fashioned whirligig toy.
Explore more science of the senses:


Ana says
I LOVE this project!!!!!!
Anne says
This looks fun! I laughed so hard when your kiddo got hit with the noisemaker. Were you able to keep a straight face while filming?
Anne says
That comment sounded like I revel in children hurting themselves. Not so, I was just surprised when it happened 🙂
Erica MomandKiddo says
Ha! No worries. I laugh at it every time, myself!
Sue says
What a neat project! I too had a good laugh at your video when your son hit himself! I guess Anne and I are sadistics together!