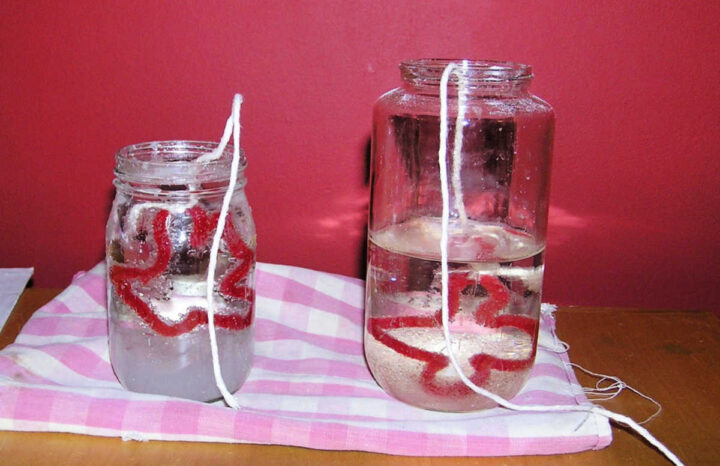
Doing simple science experiments at home that explore STEM (Science, Technology, Engineering and Math) principles with the kids is a simple and easy way to capture their interest without resorting to screen time. Observing how epsom salts grow crystals in a jar not only teaches cool science, it teaches patience, something screens almost never teach!
This science experiment will demonstrate how you can grow crystals using epsom salts on a string. We also used pipe cleaners so we could form the crystals on fun shapes.
This post contains affiliate links that may earn commission.
Science Behind Epsom Salt Crystal Formation
Epsom salt, or magnesium sulfate (MgSO4), is a naturally occurring mineral salt, composed of magnesium, sulfate, and oxygen.
Epsom salt is soluble in hot water and as the water cools, the water is unable to hold onto the salt. Instead, the salt forms crystals on available surfaces, in this case a string or pipe cleaner.
Sciencing has a nice article about how and why the crystallization happens for kids who want to learn more.
Epsom Salt Crystal Instructions
What you need:
- Heat proof jar (see notes if you don't have a heat proof container)
- String
- Pipe cleaners
- Water
- Epsom salts. Alternatively you can use plain white sugar, borax or table salt. If using borax, close adult supervision is necessary.
Step by Step Instructions:
Fill a heat proof jar with very hot water, the hotter the better.
Saturate the water with epsom salts. Some recipes for this project specify a 1 to 1 ratio of salt to water. However, you may have better luck, as we did, pouring in epsom salt until it no longer can be dissolved. For us, this was about a 2:1 ration epsom salt:water.
Tie a string to one end of the pipe cleaner.
Shape the other end of the pipe cleaner into the desired shape.
Drop the pipe cleaner into the solution, leaving the string hanging out of the jar opening.
Let the pipe cleaner sit in the solution overnight, preferably for 24 hours.

The next day, check your pipe cleaners for crystals. Some should have formed by this time, if not, you may need to wait longer. We found there was some inconsistency between jars but by the end of 24 hours you should have a nice collection of epsom salt crystals sparkling on your pipe cleaner!
MORE EASY AT HOME SCIENCE:
Notes and Extension Projects
Notes:
Young scientists will inevitably want to keep checking the pipe cleaners before the crystals are ready. This is a great opportunity to explain the importance of patience that scientists have to observe things over long periods of time, sometimes days, months, or even years!
MORE: How failure teaches kids to think like scientists.
If you are worried about the heat resistance of your jar, instead of pouring the hot water directly into the jar, you can heat it almost to boiling on the stove, saturate with epsom salt, let cool and then pour into the jar.
Extension:
Try putting your jar in the refrigerator after you've placed the pipe cleaner in the solution. Some versions of this experiment claim that it hastens the formation of crystals!
Different substances have different molecular structures and so will form different shapes of crystals. For a science lesson in comparison, follow the instructions using table salt, sugar or borax and compare the resulting crystals. How do the shape of the crystals differ? How quickly or slowly do they form? Think like scientists!


N from the Learning Ark says
Thanks for sharing this, I'll try this with my son.