This simple circuit science project is perfect for kindergarteners and first graders, but my 10 year old enjoyed it, too. It is so easy, but still produced a little spark of "wow". (Like that pun I got in there? "spark".. electric circuit project... ???...sigh) Experimenting with simple science projects at home is a good way to encourage kids to tinker and explore ideas further on their own. This may not happen right away, but the idea is to lay the groundwork for curious minds.
(This post contains affiliate links.)
Unlike many science experiments using circuits or electricity, you will most certainly have all the items at home! No need to go out and buy special clips, copper wire, switches or voltage readers. Whew! The number one reason why we don't do certain projects at home is our lack of specialty items. My seeming inability to get to the store to purchase unusual items for projects is how our love affair with Tinker Crate started (This past weekend my son made a hydraulic claw and ALL the parts were in the box. How awesome is that?). But I digress.
Note: Always supervise children when using batteries.
How to make a simple circuit
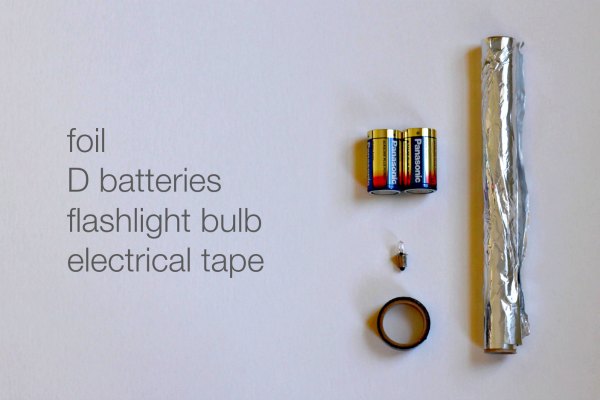
What you need:
- 1-2 D batteries. You can use one, but will get more impressive results with two.
- Aluminum foil.
- Electrical tape. Hmmm. This could qualify as a specialty item, but since I actually had some, chances are you will too.
- A light bulb from a flashlight. I can't consider this a specialty item. If you don't actually have a flashlight, you need to buy one.
- Enthusiastic scientists.
Instructions (single battery):
Cut the foil in long strips. Ours were 12 inches by 2 inches. Fold up into thin strips. Smooshing and pinching is fine. No need for it to be perfect.
Use a small piece of tape to secure the foil strip the metal ring around the light bulb. At the base of the light bulb is a metal tip (where the bulb makes contact in the flashlight), do not let this piece of foil touch that tip.
Tape the other end of the same foil strip to the negative end of the battery. Be sure the foil is covering the center of the battery end.
Tape the other foil strip to the other end of the battery, again ensuring the foil covers the center of the battery end.
Touch the free end of the second foil strip to the metal tip of the bulb, making sure NOT to touch the other piece of foil.
Magic! Electricity!
Watch our ADORABLE video:
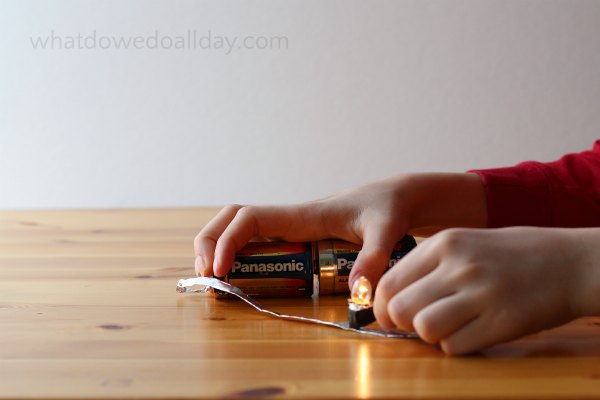
Two battery variation (pictured):
Tape the second foil strip to the positive end of the second battery.
Press the free battery ends together. Hard.
Discuss how and why the two battery version produces a different result from the single battery project.
We tried taping the batteries together, but there wasn't enough pressure to complete the circuit. It's easier if one person holds the batteries together while the other person touches the foil to the bulb.
What is happening?
The foil acts as simple conduit from the power source -- the battery -- to the bulb. (Um, hope I got that right!) The foil and power source are fairly weak so they can only power a small bulb. But still, it's a quite satisfying simple circuit science project, especially for a six year old.
More super easy science projects you can do with a six year old:
Want more 52 more STEAM activities? Get the free list, plus step by step instructions for 2 sample projects. Sign up here.


Anne says
Thank you for posting something with household items! Like you, that always seems to hold me back on projects. This is a great beginning circuit for my preschooler.
Meri Cherry says
This is so doable. My girls will love it. Love the last part of the video too : )
Katie says
This is why I love this blog.
I've been considering the tinker crate for us as well but I'm wondering if it's too advanced for a second grader (and his "helpful" first-grader bother) to do. I could help him with it, though, and I know he'd totally be into making a hydraulic claw.
Erica MomandKiddo says
I'm assuming your 2nd grader is 7 or 8? Tinker Crate is recommended for ages 8 and up. You will have to help him with certain tasks but I think it would still be good for a 7 year old who really loves science. I do still have to help my 10 year old with certain tasks (for example, if we have to fit small parts) although with each box I notice he needs less and less help. Full disclosure: I always make sure my son does his Tinker Crate when his "helpful" 6 year old brother is out of the apartment! It's become a nice mother-son activity for us, actually. If you sign up for the month to month you can cancel after the first month if it's not a good fit. Of course I REALLY love TC, which is why I keep talking about it, ha!
Katie says
Thanks for the info! Yes, he's 7.5 now and he love love loves all things electrical. I think we'll give it a try and have it be a little mom & big kid activity. I'm glad to hear that you guys like it!
Rachelle | TinkerLab says
I LOVE the video, Erica!! This is a great way to introduce circuits to little ones.
:Donna says
Such simple things can teach kids (and adults) so much 🙂
Erica MomandKiddo says
I totally agree!
Denise J says
Thanks for sharing this! My daughter and her friends at Girls Prep would love this.
Erica MomandKiddo says
I hope they have fun with it! It's so simple to do, yet so satisfying.
Amy says
OK, so I need to know - what happens if the foil touches itself? and what happens if you touch that bit of the light bulb you've been warned not to? I need to worst-case-scenario this before I let my little ones have at it.
Erica MomandKiddo says
Nothing bad will happen, it just won't work. 🙂
Erica says
I was wondering the same thing!!! lol
Sammi says
This is fabulous! I didn't have bulb holders for the traditional circuit demo so this is perfect. Will use this for my middle school science co-op class. I think it's impressive no matter what age you are. My 12 and 14 year old loved it. Thanks!
Erica MomandKiddo says
Glad you enjoyed it!
Ostapenko says
Thank you!
Dieanna says
I can’t get this to work. A video precisely showing exactly each step would be helpful. I followed the written instructions and have no light.