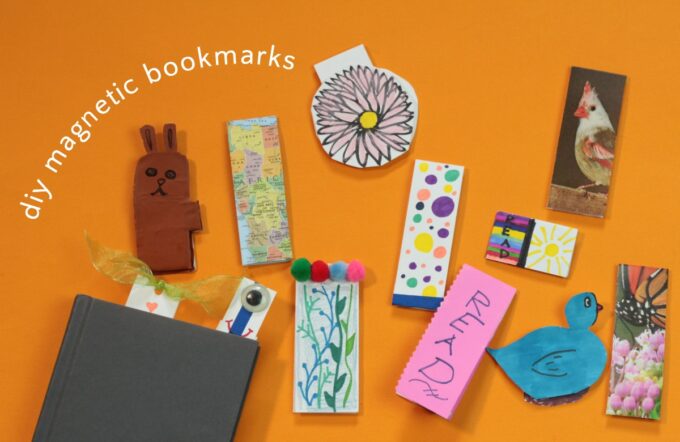
If you are a reader, you know that it is impossible to have too many bookmarks! In those rare moments when you and your kids are not reading, these diy magnetic bookmarks make a great craft! The possibilities for personalization are endless, and kid-made magnetic bookmarks make great literacy-promoting gifts, either on their own or tucked inside a book. I mean, what parent, grandparent, aunt or uncle wouldn't love to have a sweet reminder of their loved one hanging on the page of a book they are reading?

You already know we love to make our own bookmarks, whether they are origami heart bookmarks, or these fun bookmarks you will never lose! The instructions for how to make magnetic bookmarks are really easy, and I also suggest this as a quiet time activity for kids who don't like to sit still during read alouds.
Remember: Magnets are hazardous if ingested. Magnets should never be handled by children 3 and under or anyone who may put small objects in their mouth. Supervise young children. (Note: this post contains affiliate links.)
How to Make Magnetic Bookmarks
I promise, these are very easy diy magnetic bookmarks, and you most likely already have everything you need, except maybe the magnets.
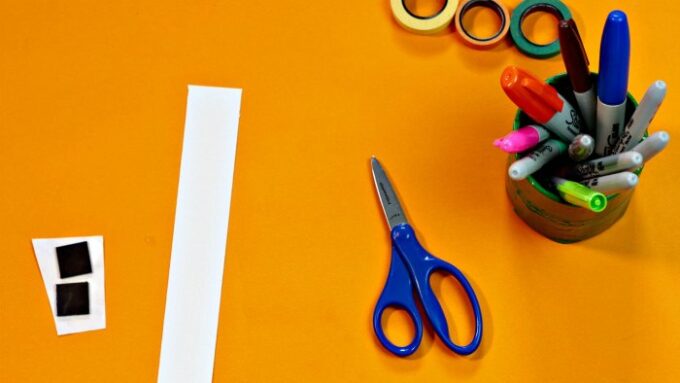
What you need:
- Card stock or other heavy paper
- Scissors. These are our favorite kid-friendly scissors.
- Drawing implements like washable markers
- Sticky-backed magnets. We used these pre-cut square magnets. You can also buy sticky magnet tape and cut it to size.
Optional materials to have on hand for creativity:
- Old magazines or calendars
- Grab bag craft supplies like googly eyes, small pompoms, foam shapes, ribbons, gems, etc.
- Glue stick or white school glue
- Washi tape
- Hole punch

Step by step instructions:
These are instructions for how to make a basic rectangular bookmark. Once your kids know the how-to, they will use their imaginations to experiment. Be sure to watch the video below for some of the ideas an 11 year old neighbor came up with!

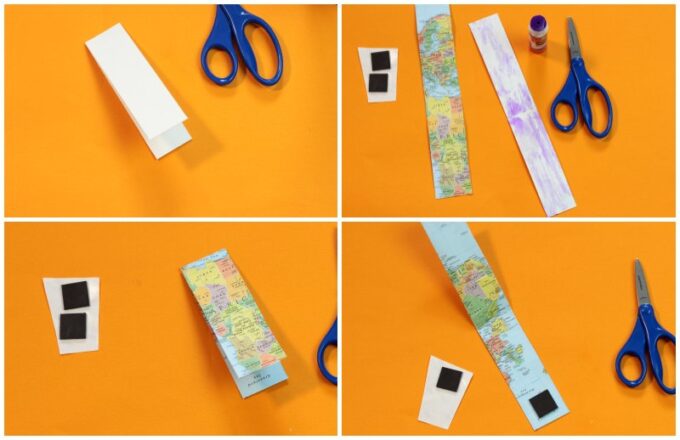
Cut the card stock into a paper strip. A nice size is about 1 inch wide and 6 inches long.
Fold the paper strip in half.
Decorate. (In the above image I used an old map)
Peel the sticky magnets off the backing and apply one magnet to each of the inside ends of the bookmark so that when closed, the magnets are aligned.
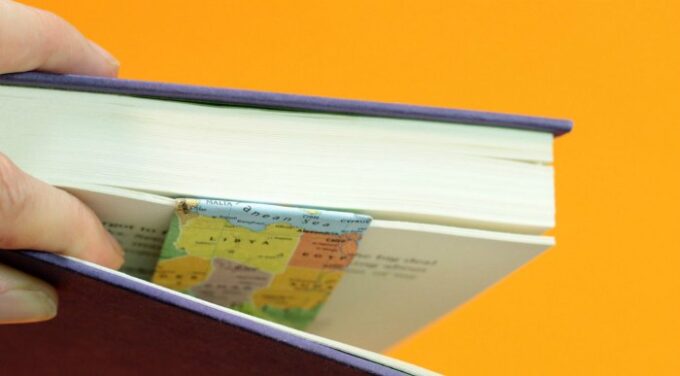
To use:
Open bookmark and insert over a page so that one magnet is on each side of the page. Voilá! Now you will never lose your place or your bookmark again!

Video Instructions
Sadly, my boys would not entertain the idea of making these bookmarks (it happens, people) but my neighbor's daughter was into it. Check out some of the cute ideas she came up with in this video. I love the bird sitting on a nest bookmark! I also show you how to make diy magnet bookmarks using old magazine pages.
Guess what? We have 9 more diy bookmark ideas right here!!


Leave a Reply